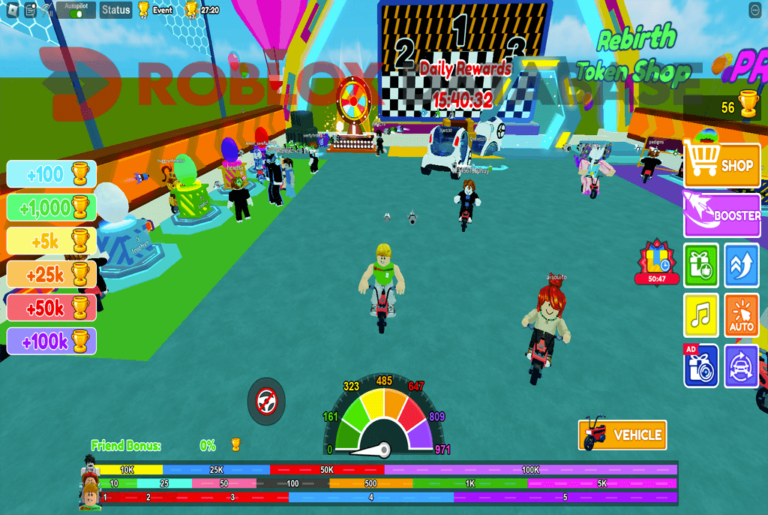
Max Speed Script
Max Speed is a racing game where getting to the front of the pack consistently takes good reaction time and a well-upgraded setup. Grinding the currency to unlock better cars or upgrades manually is the part that slows everyone down. These scripts handle the grind with Auto Farm, Speed Hack, ESP, God Mode so you can focus on racing instead of farming between sessions.

 2 working scripts
loadstring(game:HttpGet("https://raw.githubusercontent.com/ToraIsMe2/ToraIsMe2/main/0max2", true))()Max Speed Scripts (Auto Farm, Pastebin & More)
To run any of these scripts you will need a working Roblox executor. Check out the list at that link for free and paid options that work in 2026.
Max Speed Script Auto Farm, Auto Clicker & Instant Win
Max Speed Script Auto Farm, Auto Clicker & Instant Win
loadstring(game:HttpGet("https://raw.githubusercontent.com/ToraIsMe2/ToraIsMe2/main/0max2", true))()Max Speed Script Pastebin2026 :
Max Speed Script Pastebin2026 :
local SEV

getgenv().AEgg = false;

function AEgg()
    spawn(function ()
        while getgenv().AEgg == true do
            if SEV == "1" then
                local args = {[1] = "SingleLootEgg",[2] = "LE_0001"}
                game:GetService("ReplicatedStorage").Remotes.LootRF:InvokeServer(unpack(args)) wait(0.1)
            end
            if SEV == "2" then
                local args = {[1] = "SingleLootEgg",[2] = "LE_0002"}
                game:GetService("ReplicatedStorage").Remotes.LootRF:InvokeServer(unpack(args)) wait(0.1)
            end
            if SEV == "3" then
                local args = {[1] = "SingleLootEgg",[2] = "LE_0003"}
                game:GetService("ReplicatedStorage").Remotes.LootRF:InvokeServer(unpack(args)) wait(0.1)
            end
            if SEV == "4" then
                local args = {[1] = "SingleLootEgg",[2] = "LE_0004"}
                game:GetService("ReplicatedStorage").Remotes.LootRF:InvokeServer(unpack(args)) wait(0.1)
            end
            if SEV == "5" then
                local args = {[1] = "SingleLootEgg",[2] = "LE_0005"}
                game:GetService("ReplicatedStorage").Remotes.LootRF:InvokeServer(unpack(args)) wait(0.1)
            end
            if SEV == "6" then
                local args = {[1] = "SingleLootEgg",[2] = "LE_0006"}
                game:GetService("ReplicatedStorage").Remotes.LootRF:InvokeServer(unpack(args)) wait(0.1)
            end
            if SEV == "7" then
                local args = {[1] = "SingleLootEgg",[2] = "LE_0007"}
                game:GetService("ReplicatedStorage").Remotes.LootRF:InvokeServer(unpack(args)) wait(0.1)
            end
            if SEV == "8" then
                local args = {[1] = "SingleLootEgg",[2] = "LE_0008"}
                game:GetService("ReplicatedStorage").Remotes.LootRF:InvokeServer(unpack(args)) wait(0.1)
            end
            if SEV == "9" then
                local args = {[1] = "SingleLootEgg",[2] = "LE_0009"}
                game:GetService("ReplicatedStorage").Remotes.LootRF:InvokeServer(unpack(args)) wait(0.1)
            end
        end
    end)
end

local S
local J
local H
local G
local C
local CF

local OrionLib = loadstring(game:HttpGet(('https://raw.githubusercontent.com/shlexware/Orion/main/source')))()

local Window = OrionLib:MakeWindow({Name = "Lowest Speed", IntroEnabled = true, IntroText = "this game is absolute trash", HidePremium = false, SaveConfig = true, ConfigFolder = "OrionTest"})

--[[
Name = <string> - The name of the UI.
HidePremium = <bool> - Whether or not the user details shows Premium status or not.
SaveConfig = <bool> - Toggles the config saving in the UI.
ConfigFolder = <string> - The name of the folder where the configs are saved.
IntroEnabled = <bool> - Whether or not to show the intro animation.
IntroText = <string> - Text to show in the intro animation.
IntroIcon = <string> - URL to the image you want to use in the intro animation.
Icon = <string> - URL to the image you want displayed on the window.
CloseCallback = <function> - Function to execute when the window is closed.
]]

local Tab = Window:MakeTab({Name = "Main",Icon = "rbxassetid://4483345998",PremiumOnly = false})

local Section = Tab:AddSection({Name = "Autofarm"})

OrionLib:MakeNotification({Name = "yes",Content = "idk",Image = "rbxassetid://4483345998",Time = 5})

Tab:AddToggle({Name = "Auto Egg",Default = false,Callback = function(val)
    getgenv().AEgg = val
    AEgg()
end})

Tab:AddTextbox({Name = "Egg Number",Default = "",TextDisappear = false,Callback = function(val)
    SEV = val
end})

local Tab = Window:MakeTab({Name = "Credits",Icon = "rbxassetid://4483345998",PremiumOnly = false})

local Section = Tab:AddSection({Name = "Creator"})

Tab:AddButton({Name = "LuaXe Community - X_Lua#7795",Callback = function()
    setclipboard("discord.gg/vkDVfNxBTH")
end})

local Tab = Window:MakeTab({Name = "LocalPlayer",Icon = "rbxassetid://4483345998",PremiumOnly = false})

Tab:AddBind({Name = "Reset Bind, Leave Empty for none",Default = Enum.KeyCode.R,Hold = false,Callback = function()
    loadstring(game:HttpGet("https://rentry.co/mmm8gisr/raw", true))()
end})

Tab:AddBind({Name = "Rejoin Bind, Leave Empty for none",Default = Enum.KeyCode.R,Hold = false,Callback = function()
    loadstring(game:HttpGet("https://rentry.co/d6qut9f2/raw", true))()
end})

Tab:AddButton({Name = "Reset",Callback = function()
    loadstring(game:HttpGet("https://rentry.co/ov2ewd4p/raw", true))()
end})

Tab:AddButton({Name = "Rejoin",Callback = function()
    loadstring(game:HttpGet("https://rentry.co/9ox9m4bo/raw", true))()
end})

local Section = Tab:AddSection({Name = "Stuff"})

Tab:AddButton({Name = "Gaint (R15 Scale Unlocked Games)",Callback = function()
    loadstring(game:HttpGet("https://rentry.co/ycyakq2h/raw", true))()
end})

Tab:AddButton({Name = "Noclip",Callback = function()
    loadstring(game:HttpGet("https://rentry.co/hxz5edee/raw", true))()
end})

Tab:AddButton({Name = "Print XYZ",Callback = function()
    function GetPOS() return game.Players.LocalPlayer.Character.HumanoidRootPart.CFrame end print(GetPOS())
end})

Tab:AddButton({Name = "RTX Summer",Callback = function()
    loadstring(game:HttpGet("https://paste.ee/r/h4fL2", true))()
end})

Tab:AddButton({Name = "RTX Autumn",Callback = function()
    loadstring(game:HttpGet("https://paste.ee/r/9eV0M", true))()
end})

Tab:AddButton({Name = "Anti-Report",Callback = function()
    loadstring(game:HttpGet("https://paste.ee/r/GphmF", true))()
end})

local Section = Tab:AddSection({Name = "Values"})

Tab:AddSlider({Name = "WalkSpeed",Min = 0,Max = 123456789,Default = 16,Color = Color3.fromRGB(255,255,255),Increment = 1,ValueName = "",Callback = function(val)
    game:GetService("Players").LocalPlayer.Character.Humanoid.WalkSpeed = val
end})

Tab:AddSlider({Name = "JumpPower",Min = 0,Max = 1000,Default = 50,Color = Color3.fromRGB(255,255,255),Increment = 1,ValueName = "",Callback = function(val)
    game:GetService("Players").LocalPlayer.Character.Humanoid.JumpPower = val
end})

Tab:AddSlider({Name = "HipHeight",Min = 0,Max = 1000,Default = 2.7,Color = Color3.fromRGB(255,255,255),Increment = 1,ValueName = "",Callback = function(val)
    game:GetService("Players").LocalPlayer.Character.Humanoid.HipHeight = val
end})

Tab:AddSlider({Name = "Gravity",Min = 0,Max = 1000,Default = 196.2,Color = Color3.fromRGB(255,255,255),Increment = 1,ValueName = "",Callback = function(val)
    game:GetService("Workspace").Gravity = val
end})

Tab:AddSlider({Name = "Field Of View",Min = 0,Max = 120,Default = 70,Color = Color3.fromRGB(255,255,255),Increment = 1,ValueName = "Degrees",Callback = function(val)
    game.workspace.CurrentCamera.FieldOfView = val
end})

OrionLib:Init()How to Use the Max Speed Script
Copy a script from the list above first, then follow these in order.
- 01
Get a working executor – see our Roblox Executor list for free options on PC, Mobile, and Mac.
- 02
Launch Roblox and open Max Speed.
- 03
Open your executor, then click Inject or Attach.
- 04
Copy any script above and paste it into the executor script box.
- 05
Press Execute — the GUI will appear in-game.
- 06
Toggle Auto Farm, Speed Hack, ESP and other features from the GUI menu.
- 07
Always use an alt account to protect your main.
About The Max Speed Script
Max Speed is a racing game where getting consistently fast lap times and upgrading to better vehicles requires grinding currency between races. The gap between a stock car and a fully upgraded one is large enough that competing at the top level takes serious time.
These scripts handle the currency grind with auto farm so you can focus on actually racing instead of farming between sessions. Speed and teleport scripts are also useful for cutting down lap times and staying ahead of the pack.
Always run scripts on an alt to keep your main safe from any bans. The hubs in the list above update after patches so they are your best option if a standalone script breaks.
Looking for free rewards? Check out our Max Speed Codes page for every working code.
If you want a breakdown of Max Speed's mechanics, bosses, and progression milestones, the Max Speed covers all of it.
All scripts on this page are for educational purposes only. Using scripts in Roblox violates the Roblox Terms of Service and may result in your account being permanently banned or suspended without warning. RobloxDatabase.com is not responsible for any consequences from using these scripts. Always use an alt account — never your main.